


A practical guide for B2B brands on how silicone prototypes reduce development risk, validate design and manufacturability, and prepare products for mass production.
Introduction: A Silicone Product Is Not Finished When the First Sample Arrives
A silicone product may look simple after it is manufactured, but getting from a CAD file to a production-ready part is rarely a one-step process.
For consumer brands developing silicone baby products, feeding accessories, kitchenware, travel products, pet products, or other customized goods, the prototype is the stage where the design becomes a physical product that can actually be evaluated.
A prototype should answer more than one question.
Does the product look right? Does it feel right? Is the silicone hardness appropriate? Can the part be demolded successfully? Does it fit with other components? Can it withstand repeated use? Most importantly, can the same design be manufactured consistently at production volume?
This is why silicone prototyping should not be treated simply as "making a sample." It is a structured process for reducing design and manufacturing risk before a brand commits to production tooling and large-volume orders.
The most effective development path is therefore:
Concept → Prototype → Design Verification → Functional Testing → Tooling Optimization → Production-Ready Sample → Mass Production
This guide explains how that process works and what B2B buyers should evaluate at each stage.
KEAN Silicone supports brands through every stage of prototyping and production. Contact us to discuss your project →
What Is a Silicone Prototype?
A silicone prototype is an early physical representation of a proposed silicone product or component used to evaluate its design, material, structure, appearance, and manufacturability before full-scale production.
However, not every prototype has the same purpose.
An early prototype may only need to confirm the overall shape and dimensions. A later prototype may need to use the intended silicone grade and molding method so that the team can evaluate flexibility, compression, sealing, assembly, or other functional characteristics.
This distinction is important because a prototype that looks similar to the final product is not necessarily representative of the final product's performance.
For example, a 3D-printed model can be useful for checking the overall geometry of a product, but it cannot automatically reproduce the behavior of molded silicone. Silicone's flexibility, elasticity, surface feel, compression behavior, and demolding characteristics depend on the actual material and manufacturing process.
Formlabs' technical guidance similarly distinguishes between 3D-printed tooling for silicone prototypes and conventional production tooling, noting that prototype tooling can be used to validate design and material choices before transitioning to production manufacturing.
For B2B product development, it is therefore useful to define the prototype according to the question it is intended to answer.
A simple way to think about it is:
A prototype is not the final product. It is evidence that the product is moving toward the final product.
Why Do Silicone Products Need Prototypes?
The biggest reason for prototyping is risk reduction.
A silicone product may involve multiple variables simultaneously: geometry, hardness, wall thickness, color, surface texture, material grade, molding process, inserts, assembly interfaces, and packaging requirements.
A CAD model can define geometry, but it cannot fully demonstrate how the finished silicone product will behave.
This is particularly important because silicone is an elastomer. A small change in wall thickness or geometry can significantly influence flexibility and deformation. A product with the same Shore A hardness can feel completely different if its geometry changes.
Prototyping allows a development team to discover these problems while changes are still relatively manageable.
Design Risk
The product may not look or feel as expected.
Material Risk
The selected silicone hardness, grade, or curing system may not deliver the required performance.
Manufacturing Risk
A geometry that looks fine in CAD may create difficult filling, demolding, flash, air-trap, or tooling problems.
Functional Risk
The product may fail when squeezed, stretched, bent, assembled, washed, dropped, or repeatedly used.
Commercial Risk
A design that requires complicated tooling or excessive secondary processing may become too expensive at the target volume.
This is why the cost of a prototype should not be viewed in isolation.
Spending a relatively small amount on prototype development can prevent much larger costs associated with redesigning production tooling, changing a mold after approval, or discovering a functional problem after mass production has already started.
Recent silicone manufacturing guidance similarly emphasizes that useful prototypes should answer specific engineering questions, rather than simply producing a part that looks like the intended product.
Choosing the Right Prototype Method
There is no single "best" silicone prototyping method.
The appropriate method depends on what the team needs to verify.
For an early concept, speed may be more important than production similarity.
For functional validation, the actual silicone material may be more important than speed.
For final approval, the prototype should increasingly resemble the production part in geometry, material, tooling, and process.
Several methods are commonly used.
3.1 3D-Printed Models
3D printing is often useful during the earliest design stage.
It can quickly provide a physical representation of the product so designers can evaluate:
Overall dimensions
Ergonomics
Assembly relationships
Visual proportions
Clearance
Basic geometry
Packaging fit
The limitation is that most 3D-printed rigid models do not reproduce the mechanical behavior of silicone.
For example, a rigid printed model cannot accurately represent how a silicone baby spoon flexes or how a silicone suction base deforms under load.
Therefore, 3D printing is usually best treated as a design verification tool, not a replacement for a production-intent silicone sample.
3.2 Silicone Casting with Rapid Tooling
For certain products, silicone can be cast using a prototype mold created from a 3D-printed master or directly 3D-printed tooling.
This can provide a more realistic silicone prototype while avoiding the cost and lead time of a conventional production mold.
Formlabs documents several approaches, including injection-filled molds, compression molds, overmolds, and sacrificial "eggshell" molds for silicone prototyping.
This method can be useful when the development team needs to evaluate the actual tactile characteristics of silicone before investing in production tooling.
It is especially useful for:
Ergonomic products
Soft-touch components
Flexible parts
Gaskets
Small consumer products
Enclosures and grips
Early functional samples
However, prototype tooling may behave differently from production tooling, so the results should be interpreted accordingly.
3.3 Prototype Compression Molding
For silicone products manufactured using compression molding, a simplified prototype mold can sometimes be used to produce early samples.
This approach can be useful when the production material and general molding behavior need to be evaluated before committing to the final tool.
The advantage is that the prototype can be relatively representative of the eventual manufacturing route.
The limitation is that prototype tooling may not reproduce every feature of a high-volume production mold, particularly where automated loading, multi-cavity production, complex inserts, or highly optimized cycle times are involved.
3.4 Prototype Injection Molding for LSR
For products intended for liquid silicone rubber injection molding, a prototype or single-cavity tool can provide a much more production-representative sample.
This becomes particularly valuable when the design contains:
Thin sections
Complex geometry
Tight dimensional requirements
Multiple features
Overmolded inserts
Detailed textures
Complex parting lines
Dow describes LSR as a two-part liquid silicone system that can be processed through injection molding, making it suitable for automated and repeatable production of complex silicone components.
The closer the prototype process is to the intended production process, the more useful the resulting sample becomes for final design verification.
KEAN offers multiple prototyping options including 3D-printed models, rapid tooling, and production-intent samples. Discuss your prototyping needs →
Material Selection Should Happen Before Final Prototyping
One of the most common mistakes in product development is to postpone material selection until after the prototype has already been approved.
For silicone products, material selection can influence the prototype itself.
Important variables include:
Silicone type
Shore A hardness
Cure system
Color
Transparency
Tear strength
Elasticity
Compression behavior
Temperature resistance
Chemical resistance
Applicable food-contact or consumer-product requirements
For example, a soft silicone may provide a more comfortable tactile experience but may deform more easily.
A harder grade may provide better dimensional stability but produce a different user experience.
The correct hardness is therefore not determined simply by asking for "soft silicone" or "hard silicone."
It should be connected to the product's geometry and intended function.
A thin silicone wall made from a relatively firm material may still feel flexible, while a thick section made from a softer material may remain structurally stable.
This means:
Material + Geometry + Thickness = Actual Product Behavior
For production-intent prototypes, using the same or technically equivalent silicone grade planned for mass production is preferable whenever practical.
Otherwise, the prototype may pass testing while the production material behaves differently.
KEAN uses certified food-grade silicone with full material traceability. Learn about our materials →
Prototype Tooling: When Should You Invest?
Prototype tooling sits between a purely visual prototype and a production mold.
The decision to invest in prototype tooling depends on the development stage and the risks that still need to be answered.
For a simple product, a basic prototype method may be enough.
For a complex silicone product, however, a molded prototype can reveal issues that cannot be identified through CAD or 3D printing alone.
These can include:
Actual wall thickness
Demolding behavior
Flash
Parting-line position
Silicone flow
Surface texture
Insert positioning
Shrinkage
Dimensional variation
Assembly fit
Formlabs notes that traditional metal molds can involve substantial upfront tooling costs and lead times, while 3D-printed tooling can provide a faster way to validate silicone design and material choices before transitioning to conventional manufacturing.
The key is not to ask:
"What is the cheapest prototype mold?"
Instead, ask:
"What is the least expensive prototype method that can answer the engineering question we currently have?"
That is a much more useful B2B decision.
KEAN develops custom tooling with optimized cost and lead time for your project. Request a tooling quote →
Design Verification: What Should the First Silicone Sample Tell You?
When the first physical silicone sample arrives, the development team should not evaluate it only by asking whether it "looks good."
A structured design verification process is much more useful.
Geometry
Check the overall shape against the approved CAD model.
Critical dimensions should be measured rather than judged visually.
Wall Thickness
Measure areas where thickness affects flexibility, strength, sealing, or assembly.
Appearance
Evaluate:
Color
Surface texture
Gloss level
Flash
Parting lines
Mold marks
Bubbles or visible defects
Logo details
Fit
If the silicone component interacts with another part, test the actual assembly.
A gasket, lid, suction base, handle, or overmold should be evaluated together with its mating component.
Tactile Feel
For consumer products, tactile evaluation matters.
Ask:
Does it feel too soft?
Too hard?
Too sticky?
Too thin?
Too flexible?
Is the grip appropriate?
This is especially important for products that consumers touch repeatedly.
Functional Testing: From "Looks Right" to "Works Right"
The second major purpose of a prototype is functional validation.
The testing method should be determined by the product's actual use.
A baby feeding product may need repeated washing, squeezing, bending, or drop testing.
A travel product may need repeated opening and closing, compression, temperature exposure, or leak testing.
A pet product may need resistance to pulling, chewing, bending, or repeated cleaning.
A kitchen product may need heat exposure, deformation testing, and repeated-use testing.
The important principle is:
Prototype testing should reproduce foreseeable real-world use rather than simply demonstrate that the sample can be manufactured.
For a flexible product, repeated-cycle testing may be more meaningful than a single static load.
For a suction product, repeated attachment and removal may matter more than a single successful suction test.
For an overmolded component, interface durability may matter more than the appearance of the silicone surface.
The test plan should therefore be linked to the product's critical-to-function characteristics.
Prototype Testing Should Also Validate Manufacturability
A successful prototype is not necessarily one that performs well once.
It should also provide evidence that the product can be manufactured consistently.
This is where the transition from product design to manufacturing engineering becomes important.
The team should ask:
Can the mold fill consistently?
Can the product be demolded without tearing?
Can the insert remain in the correct position?
Can critical dimensions be maintained?
Can the same surface finish be reproduced?
Can flash be controlled?
Can production workers inspect the part consistently?
A prototype may reveal that a particular feature is too thin, an undercut is too aggressive, or a parting line is located in a visually unacceptable area.
These are valuable discoveries.
Finding them before mass production is exactly what prototyping is supposed to accomplish.
KEAN provides comprehensive DFM reviews to identify manufacturability issues before tooling. Request a DFM review →
From First Sample to Production-Ready Sample
The first prototype should not automatically become the production reference.
A more reliable process is iterative.
First Sample
The objective is to identify major design and manufacturing problems.
The team evaluates basic geometry, material feel, fit, appearance, and initial function.
Revised Sample
Design changes are introduced based on the first evaluation.
This may include modifying wall thickness, dimensions, hardness, texture, insert geometry, or mold features.
Production-Intent Sample
At this stage, the sample should increasingly use the intended production material, manufacturing process, and tooling concept.
This is where the development team should verify the characteristics that matter for mass production.
Production-Ready Sample
The final approved sample becomes a reference for manufacturing.
The released CAD file, material specification, color standard, critical dimensions, appearance requirements, inspection criteria, and approved sample should all be aligned.
The goal is to eliminate ambiguity between:
What the designer intended
and
What the factory is expected to produce.
Recent silicone tooling guidance emphasizes that trial samples are what ultimately demonstrate whether tooling translates the approved design into a usable molded component, with geometry, appearance, fit, and function evaluated before production.
Why Production Tooling Should Not Be Approved Too Early
One of the most expensive mistakes in custom silicone product development is changing the design after production tooling has already been completed.
This is why the order of decisions matters.
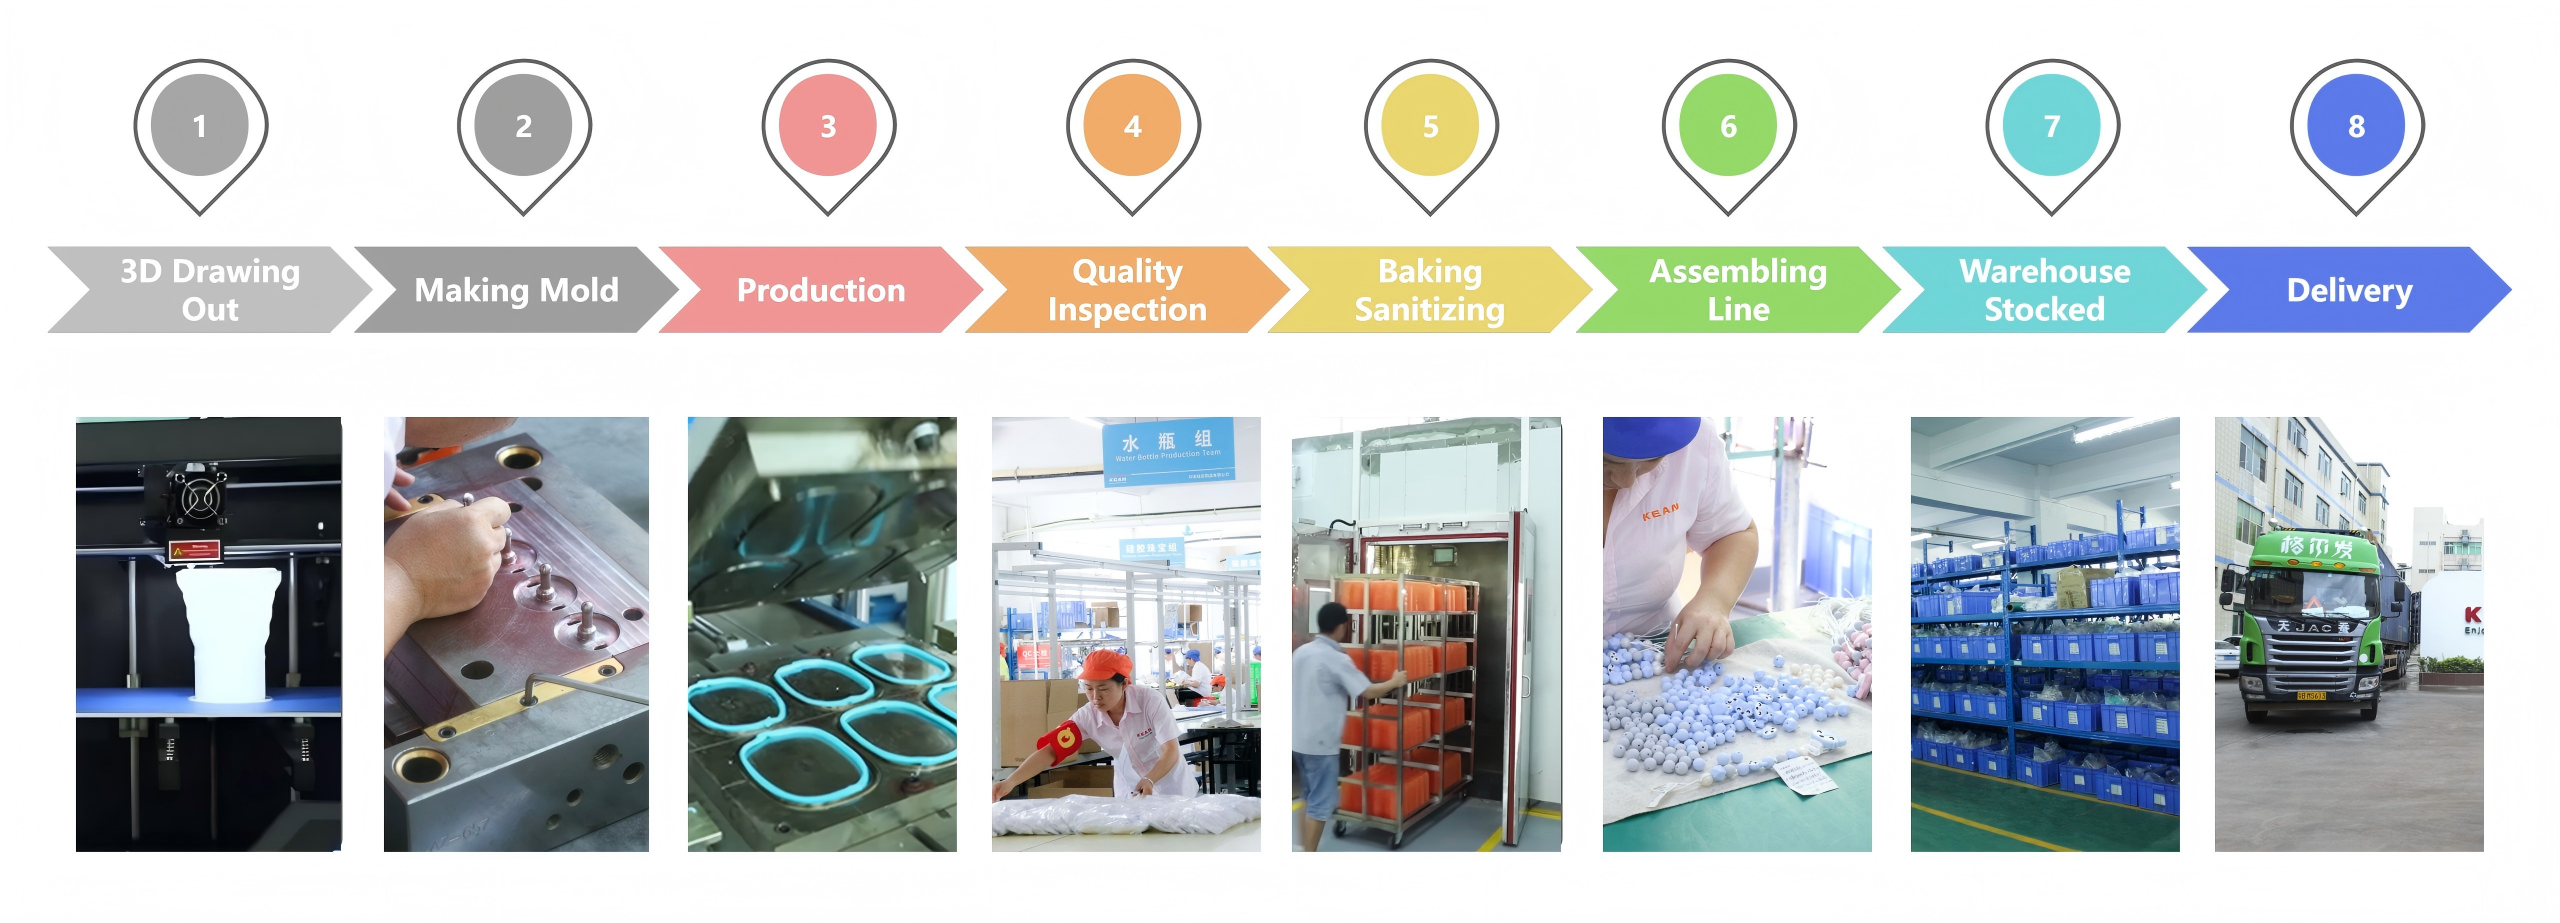
A safer development sequence is:
Product concept➡3D/CAD development➡DFM review➡Prototype➡Design verification➡Functional testing➡Design revision➡Production tooling➡Trial production➡Production approval
The prototype therefore acts as a checkpoint before a larger financial commitment.
This is particularly important when the product has:
Complex geometry
Multiple components
Overmolding
Internal inserts
Tight tolerances
Special surface textures
Custom branding
Regulatory testing requirements
The more variables a product contains, the more valuable a structured prototype stage becomes.
Lead Time and Cost: What Should B2B Buyers Expect?
Prototype cost and lead time vary significantly because there is no universal silicone prototyping process.
The main cost drivers usually include:
Prototype method
A simple visual model is generally less expensive than a molded silicone sample using custom tooling.
Tooling complexity
A simple single-cavity prototype tool is very different from a complex multi-part or multi-cavity tool.
Material
Special silicone grades, colors, hardness levels, or production-intent materials can affect cost.
Product complexity
Thin walls, undercuts, inserts, complex textures, and multi-component structures increase engineering and tooling requirements.
Number of iterations
Every design revision can require additional engineering, machining, sampling, and testing.
Testing requirements
Functional testing and regulatory testing can add both time and cost, especially when third-party laboratories are involved.
Therefore, a supplier should ideally quote prototyping based on the actual development plan rather than giving a single generic "sample price."
For example:
CAD review → DFM → prototype tool → first sample → revision → second sample → production tool → T1 sample
is a much more meaningful development plan than:
"Sample cost: $XX."
Current technical guidance also shows why prototype tooling can range from rapid 3D-printed tools to CNC-machined metal tooling depending on whether the priority is speed, functional similarity, or production readiness.
How Can Brands Control Prototype Costs?
The best way is not necessarily to choose the cheapest prototype method.
Instead, reduce unnecessary iteration.
Providing a complete development brief at the beginning can help:
Final or near-final CAD
Target dimensions
Silicone hardness
Color requirements
Intended application
Expected annual volume
Target market
Testing requirements
Packaging requirements
Critical functional requirements
The earlier these requirements are clarified, the less likely the project is to require major redesign later.
KEAN provides transparent prototyping quoteswith clear cost breakdowns. Request a quote →
The Most Important Prototype Is the One That Answers the Right Question
Different development stages require different types of prototypes.
If the question is:
"Does the product look right?"
A 3D-printed model may be sufficient.
If the question is:
"Does the silicone feel right?"
An actual silicone sample is more appropriate.
If the question is:
"Can the product perform its intended function?"
A functional silicone prototype should be tested under realistic conditions.
If the question is:
"Can this design be manufactured consistently?"
A production-representative molded sample is required.
If the question is:
"Is this ready for mass production?"
The team needs evidence from production-intent tooling, approved material, defined process parameters, inspection criteria, and functional validation.
This leads to a useful B2B principle:
Do not build the most expensive prototype first. Build the prototype that answers the most important unanswered question.
What a Good Silicone Prototyping Workflow Looks Like
For a custom silicone product, a practical workflow can be organized into five development phases.
Phase 1 — Concept Validation
The product idea is translated into CAD or a physical concept.
The goal is to confirm basic shape, size, ergonomics, and product architecture.
Phase 2 — Material and Prototype Validation
The team selects an appropriate silicone grade and produces the first physical samples.
The goal is to confirm material feel, hardness, appearance, and basic function.
Phase 3 — Engineering Validation
The design is tested under realistic use conditions.
The goal is to identify functional weaknesses and manufacturing risks.
Phase 4 — Tooling Validation
Production-intent tooling is developed and trialed.
The goal is to confirm that the approved design can be molded consistently.
Phase 5 — Production Release
The final sample, CAD, material specifications, inspection criteria, and production requirements are approved.
The goal is to create a stable manufacturing reference.
This staged approach prevents the common mistake of treating "first sample approved" and "production ready" as the same milestone.
They are not.
What B2B Buyers Should Ask a Silicone Manufacturer
When evaluating a silicone manufacturer, buyers should look beyond the supplier's ability to provide a sample.
The more important question is whether the supplier can help move the product from sample to stable production.
Ask the manufacturer:
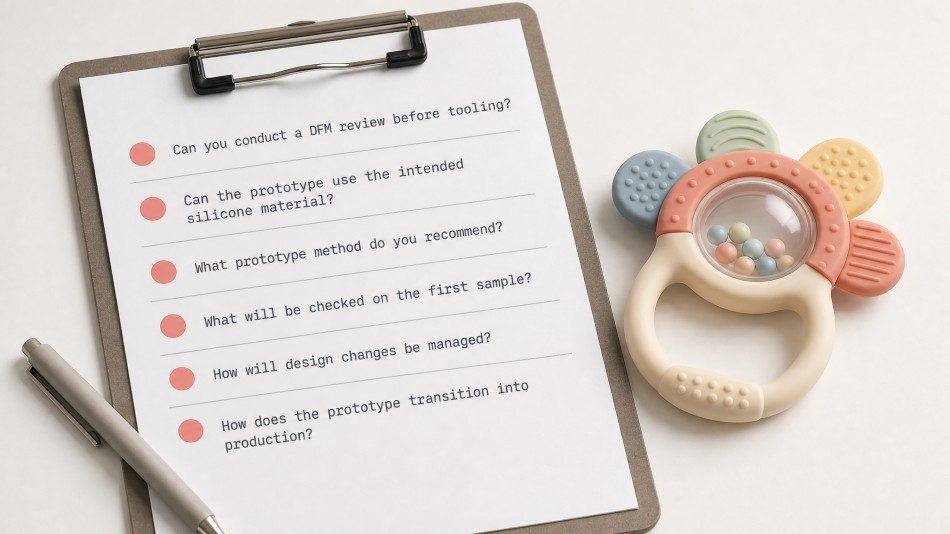
Can you conduct a DFM review before tooling?
A proper DFM review can identify issues with wall thickness, parting lines, undercuts, inserts, demolding, and silicone flow before tooling investment.
Can the prototype use the intended silicone material?
If the final product requires a particular silicone grade or hardness, clarify whether the prototype will use the same or a representative material.
What prototype method do you recommend?
The supplier should be able to explain why a particular method is appropriate for the current development stage.
What will be checked on the first sample?
Ask for measurable criteria rather than simply "sample approval."
How will design changes be managed?
A controlled revision process reduces confusion between different CAD versions and samples.
How does the prototype transition into production?
The manufacturer should be able to explain how the approved prototype becomes a production tool, production specification, and inspection standard.
These questions can reveal whether a supplier is acting merely as a sampling vendor or as a genuine product-development partner.
KEAN offers end-to-end development support from prototyping to production. Contact us to discuss your project →
From Prototype to Production: The Real Objective
The purpose of silicone prototyping is not to produce one beautiful sample.
The purpose is to create confidence that the product can be reproduced.
A successful prototype should gradually answer five questions:
1. Is the design correct?
The product has the intended shape, dimensions, appearance, and user experience.
2. Is the material correct?
The silicone grade, hardness, color, and physical properties meet the application requirements.
3. Does it function correctly?
The product performs under realistic use conditions.
4. Can it be manufactured?
The design can be molded, demolded, inspected, and assembled consistently.
5. Can it be scaled?
The production process can deliver repeatable quality at the required volume.
Only when these questions have been adequately addressed should a product move confidently into mass production.
Conclusion
Silicone prototyping is best understood as a risk-management stage in product development, not simply a way to obtain a pre-production sample.
The first prototype helps turn an idea into something physical.
Material prototypes help validate tactile and mechanical behavior.
Functional prototypes reveal how the product performs in real use.
Production-intent samples reveal whether the design can be manufactured consistently.
And the final approved sample establishes the reference point for mass production.
For B2B brands, this progression is particularly important because the cost of a mistake increases as the project moves closer to mass production.
A CAD revision is relatively easy.
A prototype revision is manageable.
A tooling revision is more expensive.
A mass-production change can affect inventory, delivery schedules, testing, packaging, and customer commitments.
The most efficient strategy is therefore not to eliminate prototyping.
It is to make every prototype answer a specific question.
At KEAN Silicone, this development philosophy can be applied across customized silicone products—from baby feeding products and toys to travel accessories, kitchen products, pet products, and other consumer applications. The objective is not simply to deliver a first sample, but to help move a product through design verification, tooling validation, and ultimately toward stable mass production.
Ready to turn your silicone product idea into a production-ready reality?Contact KEAN Silicone to start your prototyping journey →
A good prototype proves that an idea can be made.
A production-ready prototype proves that the idea can be made consistently.
📌Technical Reference
Formlabs — Silicone Part Production With 3D Printed Tools — Useful technical reference for 3D-printed silicone prototype tooling, overmolding, compression molding, material selection, mold design, and the transition from prototyping to manufacturing.
Formlabs — Silicone Part Production With 3D Printed ToolsFormlabs — How to Cast Silicone Parts in 3D Printed Molds — Covers injection-filled molds, overmolding, compression molds, parting lines, vents, alignment features, and rapid tooling.
Formlabs — How to Cast Silicone Parts in 3D Printed MoldsDow — Liquid Silicone Rubber Technology — Reference for LSR materials, injection molding, self-adhesive grades, and application-specific silicone technologies.
Dow — Liquid Silicone Rubber TechnologyWACKER — Silicone Rubber Technical Information — Technical background on liquid and solid silicone rubber materials and processing.
WACKER — Silicone Rubber Technical InformationISO — ISO 2859-1:2026 Sampling Procedures for Inspection by Attributes — Relevant reference when developing the inspection and sampling framework for production after prototype approval.
ISO — ISO 2859-1:2026


